How to set up the Midas M32 LIVE for service
The Midas M32 LIVE is a powerful digital mixing console designed for professional audio environments. In our church setting, proper configuration ensures clear sound for praise & worship, sermons, prayers, and announcements. This guide walks you through the essential steps to prepare the console for a smooth and reliable service, covering input setup, routing, and basic sound checks.
Console is powered up
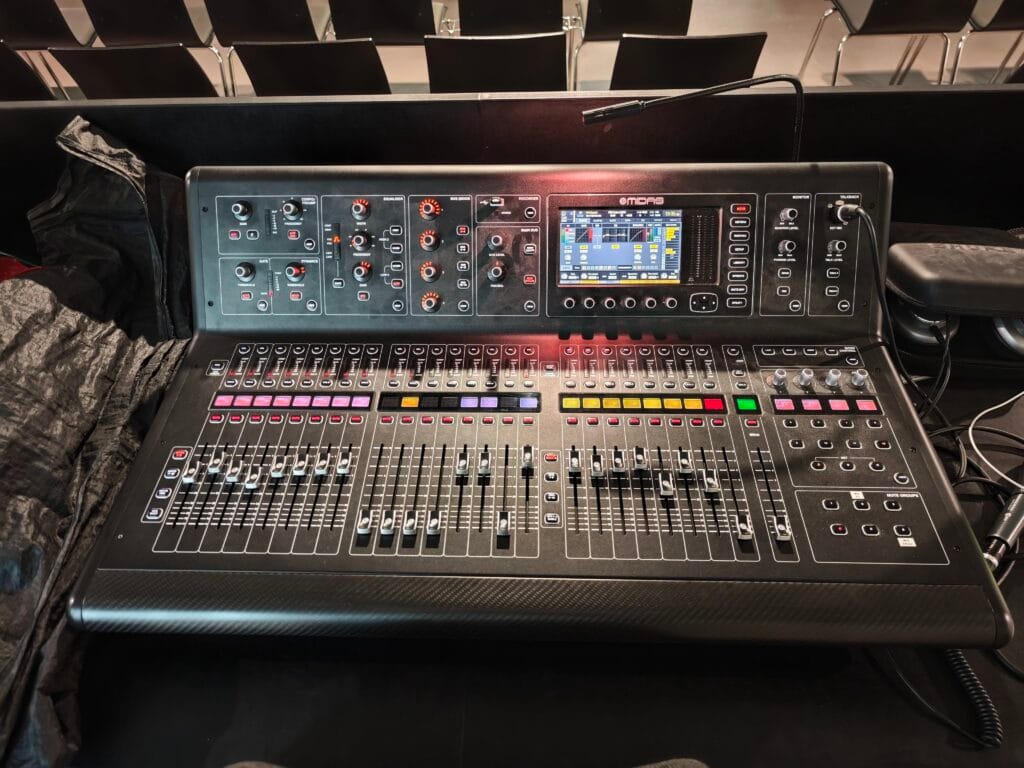
The Midas M32 LIVE is powered up together with most of the production desk by using the Master Key.
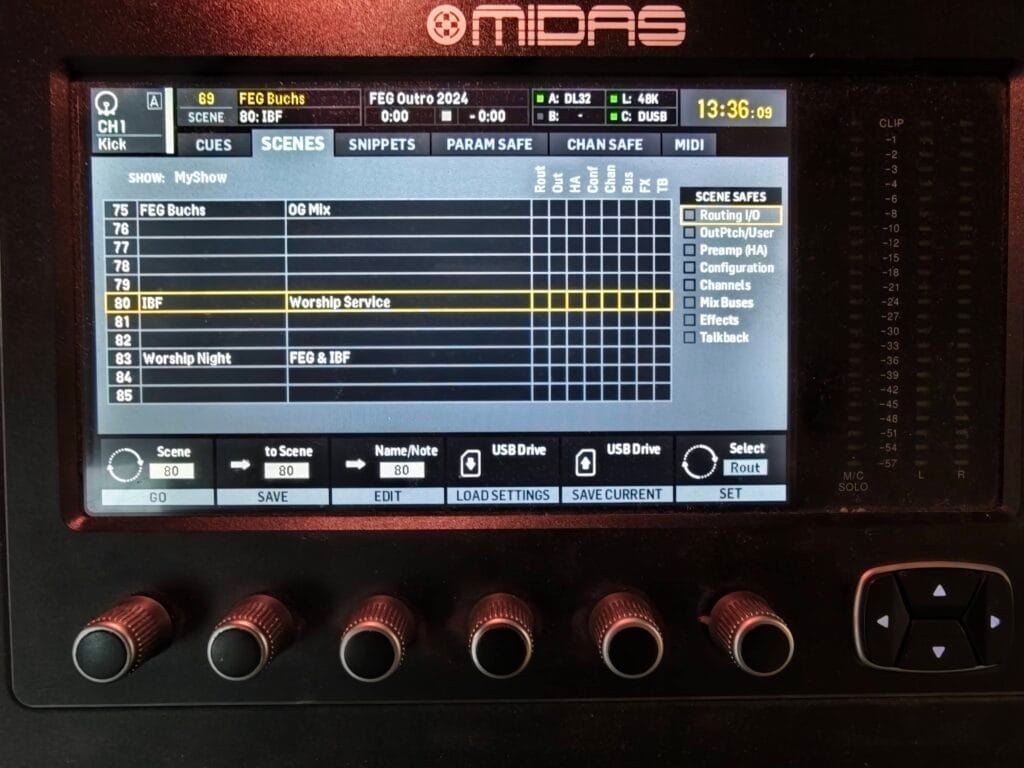
Check the yellow scene number and name at the top left of the screen. In most cases, it will power up with one of the FEG scenes active.
Load the IBF scene
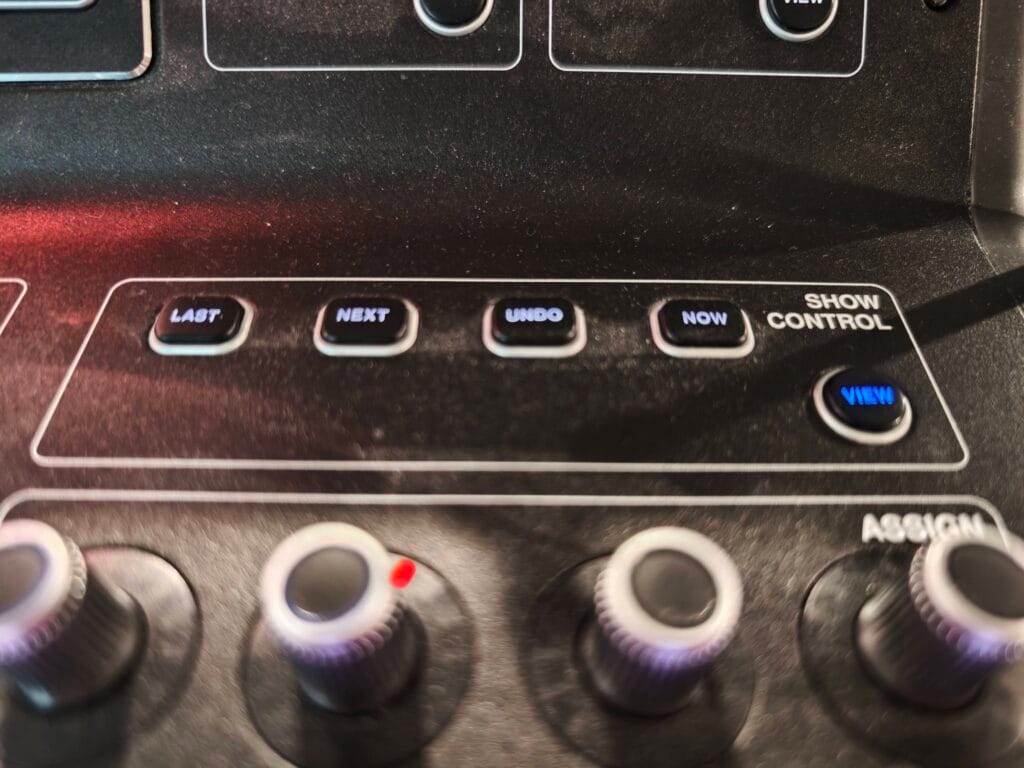
In the Show Control section at the right of the console, press the (VIEW) button to open the Show Control screen on the screen.
The SCENES page should be shown. If not, use the ◀ or ▶ buttons below the screen to flip through the tabs to the SCENES page.
Turn the leftmost dial labeled Scene until the yellow border is on scene 80 | IBF | Worship Service. Press down on the same dial to load this scene.
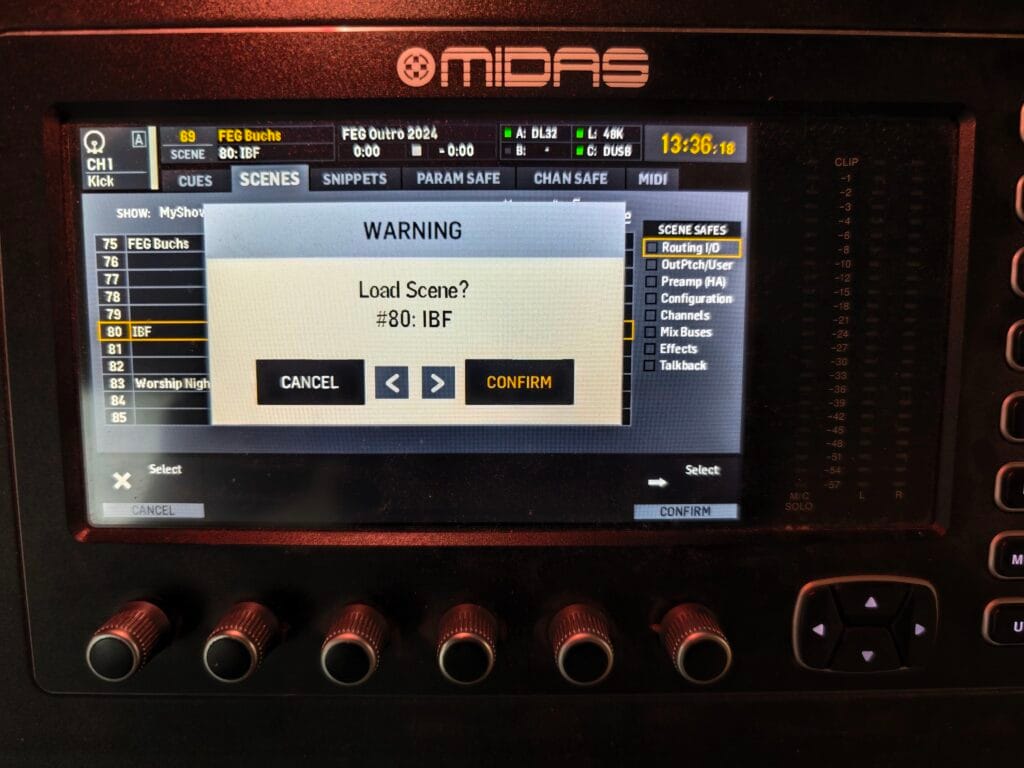
A warning will pop up to prevent accidental scene changing during a live set—pressing the leftmost dial or the ◀ button will cancel the loading and return to the scene list.
However to load this scene, press the rightmost dial or the ▶ button.
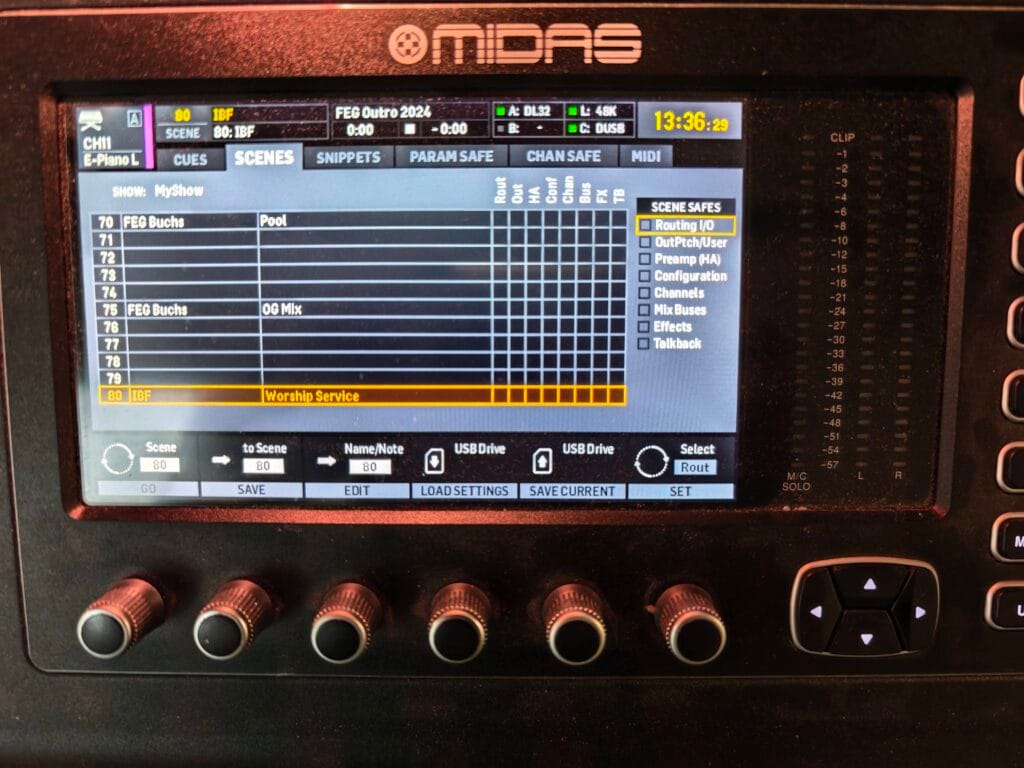
This will move most of the faders and change the colors and text on the scribble strip to the saved IBF values.
At the top left of the screen, the yellow scene number should read 80 and the scene name should read IBF.
Muting unused channels and decluttering
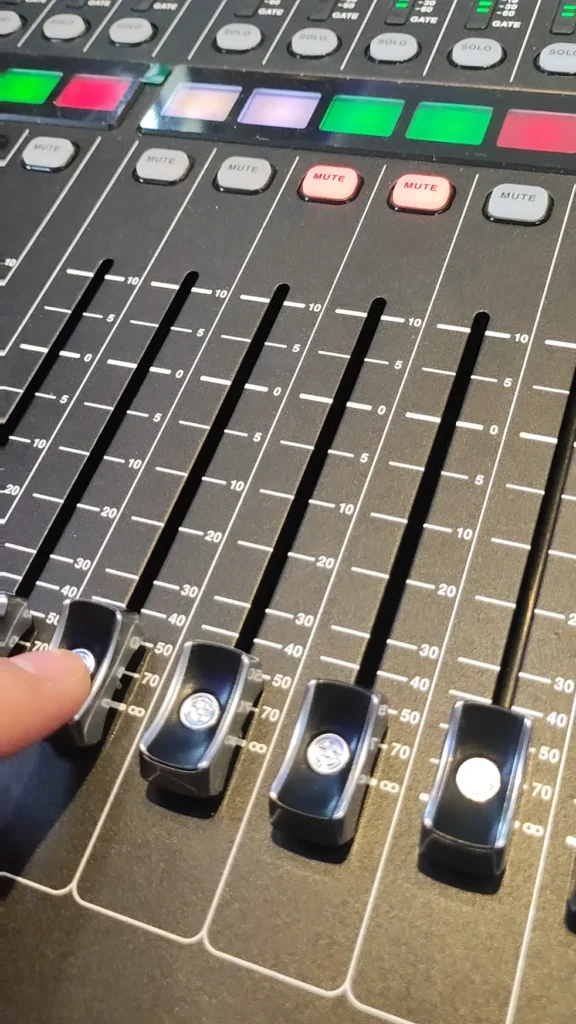
Check which microphones and instrument connections are in use. It is best practice to both [MUTE] and pull the fader down to –∞ for channels that are not in use.
A muted channel has its [MUTE] button lit up red.
If an entire DCA group is not used, you can also mute it and pull its fader down to –∞.
It is also good practice to invert the scribble strip for unused channels so that the channels in use stand out. To do this, press the SETUP button and use the arrow buttons to move to the NAME/ICON page.
First press the (SELECT) button at the top of a channel to load it to the screen. Then either turn the COLOR dial to black, or press it to INVERT the colors of the scribble strip.
If the console powers up with some channel blacked out on the scribble strip, you can make those visible by (SELECT)ing the channel and selecting any COLOR other than black.
DCA Groups for music
There are four DCA groups that allow quickly muting or volume control of instrument groups together:
- Drums & Bass
- Electric guitars
- Keys (pianos, synths)
- Acoustic guitars
The Instruments DCA group lets you mute or volume control all instruments together (e.g. if instruments are too loud over singers).
The Vocal DCA group lets you mute or volume control all singer microphones together (e.g. adjust if singers are too loud over instruments, or mute all singers if an instrumental piece is being played).
The Music DCA group lets you mute or volume control the entire band. The [MUTE] button on this DCA is the recommended way to mute the band before and after songs.
Lastly, there is an Effects DCA that lets you mute or volume control how much reverb effect is heard. This effect is effective only on singing microphones, and raising this to around 0 adds a nice hall reverb to the singing, making small mistakes less noticeable. But for spoken parts, this fader should be brought down to –20 or lower to make the spoken speech clearer. Note: the speaker microphones (TS1 through TS4) and combo mics are not routed through any effects. This DCA only applies to the wired stage mics (channels 19 through 24) and the wireless microphones H1 (channel 25), H2 (channel 26), and H3 (channel 32).
A normal level as a starting point for all DCA faders is around –5.
Speaker and guest channels
There are four wireless headset microphones available for speakers:
- TS1 (channel 27): usually assigned to a music director for talkback
- TS2 (channel 28): usually assigned to the preacher
- TS3 (channel 29): usually assigned to the emcee
- TS4 (channel 30): available for an additional guest speaker
The Combo (channel 31) can be used with either the handheld or the headset microphone. Only one option should be used, the other should remain in the cabinet drawer. This mic is most commonly handed to guest for introductions, but can also be handed to a person briefly speaking on stage (e.g. testimony).
During a sermon, typically only TS2 (channel 28) will be unmuted, while the other speaker mics and the Music DCA remain muted.
During welcome and announcements, typically only TS3 (channel 29) will be unmuted, while the other speaker mics and the Music DCA remain muted.
If the band is underscoring (playing behind a speaker), bring the Music DCA all the way down, unmute it, and gradually raise the fader to an appropriate level (–30 to –20).
A normal level as a starting point for all speaker mics is around –5. This may need to raised or lowered depending on the speaker and microphone distance from the mouth.
Instrument and Vocal channels
The channel assignments for the band are:
- Channels 1–8: Drums
- Channel 9: Bass
- Channel 10: Click (metronome)—should be unmuted but fader fully down
- Channels 11–12: Grand piano
- Channels 13–14: Digital stage piano
- Channels 15–16: Electric guitars
- Channels 17–18: Acoustic guitars
- Channels 19–24: Wired singer microphones
- Channels 25, 26, 32: Wireless singer microphones
A normal level as a starting point for all band channels is around –5. This may need to raised or lowered depending on the instrument or singer.
Set all background singer mics to around –5. Find out who is lead singer for which song, and raise that singer’s channel to around +5 for leading a song. Balance the overall singing volume by pulling back the Vocal DCA.
Computer audio source
There are a number of additional audio sources:
- Aux 1–2: Audio from presentation computer (Proclaim)
- Aux 3: Prepared for click track from a computer playing backing tracks
- Aux 4: Prepared for a guide cue track from a computer playing backing tracks
- Aux 5–6: Prepared for stereo backing tracks from a computer
A normal level for Aux channels is around –20. This may need to raised or lowered depending on the source level.
Band set-up and tear-down
Plugged in or unplugging cables, instruments or microphones can produce very loud electrical spikes that can damage the speakers and audio equipment. Always start with muted channels and DCAs. Only exceptions can be channels that are permanently plugged in (e.g. drums, computer audio).
Make sure all instruments and microphones are plugged in before unmuting the used channels.
Set all background singer mics to around –5. Find out who is lead singer for which song, and raise that singer’s channel to around +5 for leading a song. Balance the overall singing volume by pulling back the Vocal DCA.
After the service, make sure all channels with removable instruments and mics are muted before the band begins tear-down.
Before shutting down the mixing console, it is also recommended to bring the Main fader all the way down to –∞.
The mixing console is powered off together with the production desk using the Master Key.
Result
By following these instructions, your Midas M32 LIVE is fully configured for a church service, providing balanced audio for microphones, instruments, and playback sources. The setup will minimize technical issues and deliver a consistent, high-quality sound experience for the congregation.